Thursday, April 30, 2009

Denim & Daisies


Wow!!
Got another Tut done for you all
I might be getting close to 50..LOL
Click tag to get full view
You must have a working knowlrdge of PSP

Supplies:

I am useing the art work of Elias Chatzoudis
you must have a license to use his work
and you can get it over at MPT HERE

An Awesome FTU Scrap called Denim & Daisies
over at Chica Designz HERE
She has Great Talent go check her out
Make sure you leave some love while downloading
Thanks Sweetie..Muah!!

Mask of choice
I'm using Mask #84 from Chelle
you can find it HERE
Thanks Again!!

Font of choice
I'm useing Steeleplate Gothic Bold

Ok Finally since you got all that...Let's Begin

Open a new canvas 700/700
Flood fill with a color of choice
Layers/New Mask Layer/Find your mask
Merge/Merge Group
Effects/Texture Effects/Weave
Gap~2
Width~10
Opac~2
Color~White

Copy & Paste the Wood Frame
Image/Rotate/Free Rotate/Right 90 degree's
Resize
Click inside Frame with Magic Wand
Selections/Modify/Expand by 5
Paper of choice
Selections/Invert/Hit Delete on your keyboard
Dropshadow Frame

Grab the Wrapped Vine
Resize & Place to the right handside of your Frame
Dropshadow

Copy & Paste your tube of choice
Place to the left, I had to mirror mine
Dropshadow

Grab Flower 3
Resize to the size you would like
Place them around your Frame
Look at mine for a Guide
I tried to place them in a circle
Move them below the Frame
but above the Mask Layer
Dropshadow all of them

Find the Glitter Swirl
Resize
Place at the top of the Frame
Duplicate
Image/Flip
Dropshadow Both
I placed mine under the Frame & Paper
But above my Flowers

Now Get the Bug & Butterfly
and place them where you wish
Dropshadow

Add your Copywrite & your Name and
Resize 80-90%
Woot!!
Your Done

This Tut was written by me on April 30th, 2009
Any resemblance to any other Tut is purely coincidental

Tuesday, April 28, 2009

Wow!! Got Another Award

Woot!!
Got Another Award
This Award came from a Good Friend
Bright over at Bright's Kreationz
Go check her Tut out over HERE
Thank You Sweetie!!
I Love it
Now I've got to pass it on to 5 more
Fabby People
They are:
Kay over at Kay Xclusive HERE
Sylive over at Sylly Creationz HERE
Dawn over at Dawn's Artistic Creationz HERE
Yvette & Missy over at Misfits Scrapz HERE
Karla over at Lacarolita's Designz HERE
There all Awesome Tut Writers & Scrap Designers
go check them out..
Hugs

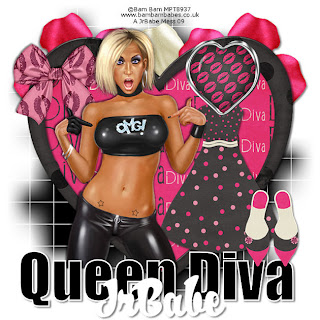
Queen Diva

Dang!!
What's wrong with me
3 Tuts in the last 3 days
Actually this one was inspired by a
good Friend Jody over at KMD but
she used a different tube
But I just bought this one & thought it
fit better

Click tag to get full view
You must have a working knowledge of Psp

Supplies:

I am useing the work of Bam Bam
you can find his work over at
MPT HERE you must have a liscense to use
his work

Again I am useing Mask #84 from
Chelle over at Weescotslass
you can find it HERE

Font of choice
the 2 I am useing is called
Impact & A&S Rister

I am using a FTU Scrap
called Divalicious over at Misfits Scraps
you can find it HERE
Make sure you leave some love
Thank You Hun!!

Get Comfy..Let's get this thing started

Open a new canvas 700/700
Flood fill with Black
Layers/New Mask Layer
find your mask in the drop down box
Merge/Merge Group

Find a Heart you are going to use
Paste as a new layer
Magic Wand click inside the heart
Selections/Expand by 5
Copy & Paste a paper of choice
Selections/Invert/Hit delete on your keyboard
Dropshadow your heart

Grab the tube you are going to use
and place it where you wish
Dropshadow

Grab a Dress
Place it next to the tube
I placed mine under it
Dropshadow

Find a Ribbon
Place it to the otherside of the tube
Dropshadow it

Find a Brad
Place it ontop of the dress
Look at mine for refrence
Dropshadow

Grab some Flowers
Enlarge them and place
them between your Frame
and your mask
Dropshadow all three

Add the word art that you
are going to use
Dropshadow it

Grab the Shoes
Place it to the top right
of the wordart you just did
Dropshadow

Add your Copywrite & Your Name
Resize 80-90%

WooHoo!!
Your Done

Hope you enjoyed another Tut
This Tut was written by me on April 28th, 2009
Any resemblance to anyother Tut is purely Coincedental

Monday, April 27, 2009

Tasty Yummy

Wow!!
Got another Tut for you
Can ya believe it?

Click on tag to get full view
You must have a working knowlegede of Psp

Supplies:

I am useing the art work of Elias Chatzoudis
you must have a license to use his work
you can get that over at MPT HERE

Font of choice I am useing Media Gothic
Mask #84 from Chelle HERE

Template #38 from Kristen
you can find it HERE

A FTU Scrap from Yarrow
called Sweet you can find it over on
her Blog HERE
Make sure you leave some Love
Thank You Hun!!

Ready? Get Comfy

Open Template, Delete Copywrite
Canvas/Canvas Size 600/600

Copy & Paste a paper of choice
Layers/New Mask Layer
Find your mask
Merge/Merge Group
I added a Weave Effect to mine
Gap~2
Width~10
Opac~2
Color~Black

Click on Circle
Selections/Select All/Float/Defloat
Copy & Paste a paper of choice
Selections/Invert/Delete on your keyboard
Dropshadow

Do the same with the Square layers
Dropshadow them

Move up the Sticky Sweet Wordart
Than move up the Tasty Yummy
If you want them different colors do the same
steps above with a color or paper of choice
And do the same with the Candy word art
I did a Weave Effect with it too
Dropshadow

Add your Tube
Dropshadow

Click on Candy 1
Image/Mirror/Image/Flip
Doing the same steps above
use paper of choice
Bring it to the top
Do the same with the little one as well
Dropshadow

Grab a flower of choice
Resize place where you would like
I covered the end of my tube with one
Dropshadow

Get a Sucker of choice
Erase the stick part
Place it in the middle of your flower
Dropshadow it

Find a Butterfly
Place it where you would like
Dropshadow

Add your Copywrite & Name

Hope you enjoyed another Tut
This Tut was written by me on April 27th, 2009
Any resemblane to any other tut is purely coincedental

Sunday, April 26, 2009

Bitch

Yay!!
Got a new Tut for ya'll
I thought I was looseing my mojo
I was playing with Templates & couldn't finish
a one I was messing with
So I finally seen this one & remembered the tube

Click tag to get full view
You must have a working knowledege of Psp
Supplies:
I am useing the HOT work of Keith Garvey
You must have a license to use his work
and you can get it over at MPT HERE

Font of choice the one
I'm useing is a Standard Psp one
Copperplate Gothic Bold

Mask of choice or the one
I'm using is from Chelle over at Weescotslass
#84 you can find it HERE
Thank You Again Hun!!

Missy's template #216
over at Divine Intentionz
You can find many awesome Templates
over at her blog HERE
Make sure you leave her some Love
Thanks Sweetie!!

There are No Scraps
I'm just useing the colors from the Tube
Ready? Another Easy One

Open Template & Delete the copywrite layer
Image/Canvas Size 550/550
Click on the background layer
and flood fill it with white

Find a color from the tube that
you are going to use
Mask/New Mask Layer & find your mask
Merge/Merge Group
Effects/Texture Effects/Weave
Gap~2
Width~10
Opac~2
Color~Black

Click on Circle 1
Selections/Select All/Float/Defloat
New Raster layer
Flood fill with a color from your tube
Dropshadow

Click on Circle 2
Do the same steps above
or you can leave it Black like mine
Make it your own
Use the same Weave Effect that we did
on the Mask
Dropshadow

Do the same with the Bitch wordart
again I used a color from my tube
Dropshadow
I used White so it would show up more
Dropshadow
The Circle Bitch Word art

Add the tube you are going to use
Copywrite & Your Name

WooHoo!!
Can't ask for a more Easy, Peasy Tut than that
This tut was written by me on Apirl 26th, 2009
Any resemblance to any other tut is purely coincidental


Friday, April 24, 2009

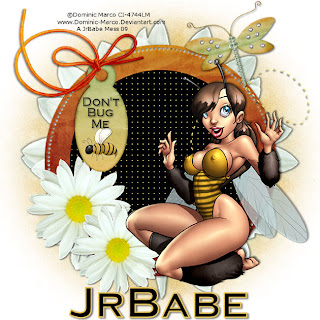
Don't Bug Me


Hello Peeps!!
Got an evening to myself so
I've got antoher Tut for you..WooHoo
Hope everyone has a Good Weekend.

Click tag to get full view.
You must have a working knowledge of Psp.

I am useing the Cute work of Dominic Marco
You must have a license to use his art
and you can do that over at CILM HERE

Supplies:
Tube of choice & Font of choice
I am useing Media Gothic & Copperplate Gothic
Mask of choice, I used a round one

A very cute FTU Scrap called Bug Me
from Diane HERE
Make sure you leave some Love while
downloading it only takes a few minutes.
Thank You Hun!!

Ready to get started? Easy Peasy

Open a new canvas 700/700
Flood fill with a color of choice
Layers/New Mask Layer, find the mask
that you are going to use.
Merge/Merge Group
I duplicated mine & added some Noise

Get the Circle
Paste as a new Layer/I enlarged mine some
Magic Wand/Click inside/Selections/Modify/Expand by 5
New Raster Layer/Flood fill with another color of choice
Selections/Select none
Move below the frame
Effects/Texture Effects/Weave
Gap~2
Width~10
Opac~2
Color~Black
Or you can do that color of choice as well
Mine is just a guide
Dropshadow your frame

Find the Daisy
Paste as a new layer again I enlarged mine just
big enough to peek over the frame
Move it under the frame but above the mask layers
Duplicate and on the bottom layer
Adjust/Blur/Gaussian Blur/Radius set on 15
I dropshadowed the top Daisy

Again Copy & Paste the Daisy
as a new Layer & Place them where you wish
Dropshadow

Grab the Bug Trail, well I'm useing mine as
a Butterfly trail and place it where you wish
Duplicate if you want I did mine so it stood out more
Dropshadow the bottom one

Get one of the Butterfly's you are going to use
and place it at the end to make it look like its
flying around
Dropshadow

Get the Tag
Place it where you wish as well
Dropshadow it

Find the String that is tied
in a bow and place it over it
Dropshadow

Now place the tube you are going to
where you would like it
Dropshadow

Add your Copywrite & Your Name
And add something to the tag if you
would like
Resize 80-90%

Yay!! Your Done

This Tut was written by me on April 24th, 2009
Any resemblance to another tutorial is purely coincidental

Thursday, April 16, 2009

Pink A Licious

Yay!!
Another Tut for you
Maybe I will hit 50 soon...LOL

Click Tag to get full View
You must have a working knowledge of Psp to do this Tut

Supplies:
Tube of choice
I used Ismael Rac
You must have a license to use his work
You can find it over at MPT HERE

A FTU Scrap of Bel Vidotti Scraps
Called Pink A Licious
You can find it over on her Blog HERE
Make sure you leave some Love while downloading
It only takes a few minutes
Thank You Sweetie...Hugs

Mask of choice & Font of choice
Mask I can't remember where I got it from
Font is A&S Snapper Script

You Ready? Get Comfy...Let's Do It

Open a New Canvas 700/700

Find the Paper you are going to use
Mask/New Mask Layer
Merge/Merge Group

Grab Ribbon 5
Paste as a new layer
Resize
Magic Wand/Selections/Modify/Expand by 5
Paper of choice
Selections/Invert/Hit Delete on your keyboard
Dropshadow

Tube of choice
Move under the Ribbon
Duplicate
Move the Duplicated one above Ribbon
Erase any parts on both tubes that you don't want showing
Dropshadow

Find Leaves 2
Move above your mask layer
Dropshadow
Duplicate/Image Mirror

Grab the Sequins of Choice
Place them under your Leaves
Dropshadow
Duplicate/Image/Mirror
Find Flower 3
Place where you wish
Dropshadow

Grab any of the other Flowers
or anyother Emblishments of choice
and place them where you would like
she has plenty there to work with
Mine is just a Guide
Dropshadow each of them

Add your Copywrite & You Name
Resize 80-90%

WooHoo!!
Your Done

Hope you Enjoyed antoher Tut
This was written by me on April 16th, 2009
Any resemblance to any other Tut is purely coincidental
New Award


I've Recieved This Awesome Award From
Dawn over at her Fabby Blog
Called Dawn's Artistic Creationz HERE
Thanks Sweetie I'm Very Honard
Mwah
Now I have to pass this on to 3 others
1.Lacarolita's Designz HERE
2. Sylive of Sylly Creationz HERE
3. Kay of Kay Xclusive HERE

Wednesday, April 15, 2009

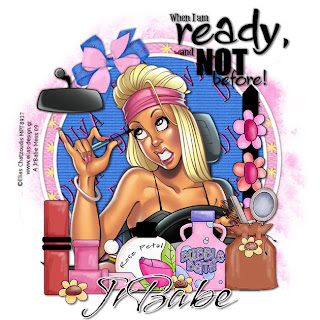
When I'm Ready


Woohoo!!
Can ya believe it?
Got another day to myself
So I got another Tut for you
This Tut was inspired by a good friend
from KMD Deb she used the wordart in it
for the Wordart Challenge in the group
So I asked her if I could Tut it
Thank You Hun!!
Click Tag to get full view
You must have a working knowledge of Psp to do this Tut

Supplies:
I am useing the Cute work of Elias Chatzoudis
You must have a license to use his work
You can get it over at MPT HERE

A Cute FTU Scrap called All About The Girls
from Karla over at Lacarolita's Designz
You can find it HERE
Make sure to leave some love for her it goes along way
Thank You Sweeite...Mwah
Word art came from Bethany
She has some Great Word Art
you can find it HERE
Mask of choice
I can't remember where I got mine from
I've had it forever
Font of choice
I'm useing Vujahday Script

Ready? Get Comfy!
Open a New Canvas 700/700
Ellipse Tool/Set on Circle
Line Width 8
Over in the Materials Plaette
Background Null
Foreground White
Draw out a Circle
Convert To Raster Layer
Magic Wand & Click inside of circle
Find Paper of choice
Selections Invert/Hit Delete on your keyboard
Dropshadow
Do the same for the inside circle
Copy/Paste Tube of choice
And postion where you think looks best
Dropshadow

Find the Ribbon you are going to use
Place it to the top left
Dropshadow
Get The Wordart
Resize
And Place it where you would like it
Dropshadow

Grab Element 4
Resize
Image/Rotate/Free Rotate
Right 90 degrees
Place it to the right
Dropshadow

Find Element 18
Resize
Place it where you wish
Dropshadow

Grab the one of the Bubble Bath Elements
Resize & Place it under the Bag
Dropshadow

Find one of the Perfume Bottles
Resize it
Place next to the Bubble Bath Bottle
Dropshadow it

Now Grab one of the Lipsticks
Resize
Place it next to the Perfume Bottle
Dropshadow
You don't to use what I used
She has pently to work with
Make it as your own, mine is just a guide

Click on the Background
Fill with Paper of choice or Flood Fill
with Color of choice
Layer's/ New Mask Layer
Find your mask
Merge/Merge Group

Add your Copywrite/Name
Resize 80-90%
Wholla!!
Your Done
This Tut was written by me on April 15th, 2009
Any resemblance to any other Tut is purely coincidental

Tuesday, April 14, 2009

Sexy Misfit

Yay!!
Got another day to myself so I've got another Tut for you

Click tag to get full view
You must have a working knowlege of Psp to do this Tut

Supplies:
I am useing the Awesome Work of Ismael Rac
You must have a license to use his work
you can find it over at MPT HERE

I am useing a Template from Melissaz Creationz #31
you can find her Fabby Temps HERE
Make sure you leave some Love, it goes along way
Thank You Hun!!

Again I am useing Mask #84
From Chelle of Weescotslass Creations
you can find it HERE
Thank you Again Hun, Muah

Scrap Kit...None

Ready to get started? Easy Peasy

Open your Template
Delete the copywrite layer

Click on the large circle layer
Selections/Select All/Float/Defloat
New Raster Layer/Flood fill with color of choice
Effects/Texture Effects/Weave
Gap~2
Width~10
Opac~2
Color~Black
Dropshadow

Continue above steps with the rest of the layers
with Colors of choice

Click inside of each frame
Selections/Expand by 2
Copy & Paste Tube of choice
Adjust/Hue & Saturation
Both set to zero
Dropshadow
Continue to do this with the rest of the frames
Dropshadow your frames

Add the other Tube that you are going
to use & Postion it where you wish
Dropshadow it

Click on Raster 1
Flood fill with color of choice
Layers/New Mask Layer/Find the mask
Merge/Merge Group
Now if you want to use 2 different colors
do the same steps above
I put the Weave Effect above
on the blue one

Add your Copywrite & You Name
Resize 80-90%
WooHoo!!
Your Done

Hope you enjoyed another Tut
This Tut was written by me on April 14th 2009
Any resemblance to any other Tut is purley coincidental

Friday, April 10, 2009

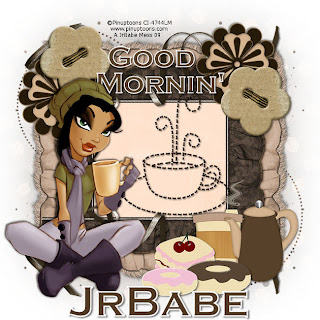
Good Mornin'


Yay!!
Happy Friday Everyone!!
Got Another Tut for you
Click tag to get Full View.
You must have a working knowlege of Psp to do this Tut
I am useing the cute work of Pinuptoons
You must have a license to use this work
and you can get it over at CILM HERE
Font of Choice I am useing Copperplate Gotic Bold
it is a Standard PSP font you should have it.
Mask of choice the one I am useing came from
Babe over at Babe's Designz #16
You can get it HERE
Remember to leave some Love, it goes along way
Thank You Hun!!
I am useing an Awesome Freebie from a Fabby Gal
Rachel over at Captivated Visions called Coffee Break
you can find it HERE
Make sure you leave her some Love as well
Thank You G/F...Muah
Ready to get started? Easy, Peasy
Open a new Canvas 700/700
Paper of choice, Layers/New Mask Layer
find your mask that you are useing in the dropdown box
Apply, Merge/Merge Group
Grab Ruffle Element
Resize/Paste as a new layer/Image Rotate/Free Rotate
Left/90 Degrees
Place to the right
Dropshadow
Layer's/Duplicate/Image Mirror
Layers/Duplicate/Image/Free Rotate
Right/90 Degrees/Place to the top of the tag
Like your makeing a frame
Layers/Duplicate/Image/Flip
Now you have a frame.
Grab another Paper of choice
Resize it that it fits under all the Ruffle
I resized mine twice by 80%
Move it to the bottom of them all
Now find the ribbon
Place on the top ruffle
Dropshadow
Layers/Duplicate/Image/Flip
Find the Flower
Place to the top right corner
Dropshadow
Layers/Duplicate
Mirror but move this one down alittle on the left
Look at mine for a guide
Now Grab the button
Place it over the top of your Flower to the right but down alittle
Dropshadow
Layers/Duplicate
Image/Mirror
Place it ontop of the Flower
Grab the tube that you are going to be useing
Move it to the left alittle
Dropshadow
Find the stitched Coffee Cup
Resize/Place it to the right of your tube
Light Dropshadow
Grab the Coffee Pot
Resize to your likeing
Place to the bottom right of your tag
Dropshadow
Now find the steaming Coffee Cup
Resize & Place it under the Coffee Pot
Dropshadow
Now find the Donuts & Cake
Place them as you like
Dropshadow
Add any other emblishments of
choice she gave you plently to play with
Now add your Wording if you would like some
Add your Copywrite & Your Name
Woot!!
Your Done
Resize 80-90%
Hope you Enjoyed another Tut
This Tut was written by Me on April 1oth 2009
Any resemblance to any other Tut is purely coincidental

Thursday, April 9, 2009

New Layout!!

Woot!!
It's so Fresh & Springy
She did an AWESOME JOB
I just LURV IT
I had a Fabby Friend Rachel of Captivated Visions
make it for me. I told her yesterday that I was looking
for one and she said she would do one up for me when she had
time & I told her only if she was bored...LOL, she IM'ed me this morning
and said she got one done. Thank You So Much G/F...BIG HUGE HUGS
Go Check her Awesome Layouts HERE

Tuesday, April 7, 2009

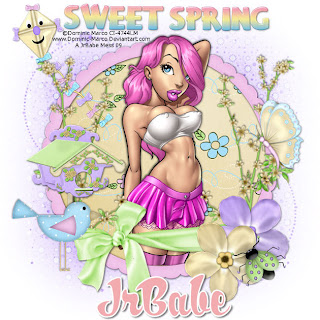
Sweet Spring

Woot!!
Finally got a day to myself & found a scarp that I could get a tut up..
Long time comeing...
Now let's see if I can remember how to write these things...LOL

Click tag to get full view.
You must have a working knowledge to do this Tut.

I am useing the cute work of Dominic Marco
you can find his work over at CILM HERE
You must have a license to use it.

Font of choice I used A&S Rister
Mask of choice the one I am useing is from
Babe over at Babe Designz #16 HERE
Thank You Hun for your Awesome Mask!!

I am useing a Bright FTU Scrap from Monica over
at Simply Sensational Scraps you can find it HERE
Thank You Sweetie for another Awesome Freebie!!
Make sure you leave some love as well

Ready To Get Started?

Open a new canvas 700x700
Grab a paper of choice, you will have to
enlarge it, Layers/New Mask Layer
Find your mask/apply
Merge, Merge Group

Find the Frame you are going to use
Selections, Modify, Expand by 5
Paper of choice
Selections, Invert, Hit Delete on your keyboard
Dropshadow Frame

Find your tube that you are wanting to use
Move it below your frame & Duplicate it
and bring that one above the frame
Erase any parts you don't want showing
Dropshadow

Grab a bow of choice, place it down at
the bottom of your frame
Resize to your likeing
Erase any parts of the bow you don't
want hanging over your frame
Dropshadow

Find a blossom of choice
Place it to the right of the frame
You might have to erase parts so its
not hanging over the bow
Duplicate, Image, Mirrow
Dropshadow Both

Grab one of the Birdhouses of choice
Place it to the left or where you wish
Mine is just a guide
Dropshadow

Find a Bird & Butterfly of choice
and place them where you wish as well
Dropshadow

If you would like to use a Kite find
one that you would like to use and
place it below your blossoms
Dropshadow it

Grab some Flowers & Place
them at the bottom right of your frame
over your bow
and Dropshadow them

Grab a little Ladybug and place
it ontop of them
Dropshadow that little guy as well

If you would like to put some word art
on it going ahead & resize those & Place them
where you would like

Add your copywrite & your name
Resize 85-90%

YAY!!
Your Done
Hope you enjoyed another Tut

This Tut was written by me on April 7th 2009
Any resemblance to any other Tut is purely coincidental