Thursday, January 29, 2009

Blog Challenge

I had seen this Challenge amoungest my many journey's of Blog Hoppin.
Was really hopeing I wouldn't get it. I was really going to hate if I had to
really explain that 6th picutre in the 6th folder...BUT THANK GOD it wasn't
anything bad...
Stayyseee over at Stayysee Productions hit me with it..Thanks Hun!!
So here it is:

This is my Great Neice, Kasey Jo...YES my Neice is a Nascar fan
just like me...She gets alot of MY GOOD QULITY'S...LOL
But she is a Kasey Kahne Fan...
My other half & I had her for a weekend & she went to her first
K-State Football Game..
So this is Kasey & my other half Brian


So Now I have to challeng 3 others
And they are:
Lisa over at Lisa's Creative Clutter

Doris over at Scraps Dimensions

And Zory over at Boomie's Scrapz & Designz
So Ladies Let's see that
6th Picture in the 6th Folder
HUGS


Wanna Lick


Got another Easy Peasy one for you!!
Click on Tag to get full view
You must have a working knowledge of PSP to do this tut
I am useing a Tube by Ismael Rac
You can find his art over at MPT
You must have a license to use his work
Font of Choice
I am useing 2 Peas Mister Giggles
Mask of choice
I am using #84 from Weescotslass
You can find it HERE
I am useing a FTU Scrap called Dotty
from Kristin over at Wicked Scrapz
You can find it HERE
Make sure to leave some Love while downloading
It only takes a few minutes while downloading
Thank You Hun!!
Ready to get Started? Get Comfy
Open a new Canvas 700x700
You can crop & resize later
Grab Frame 1 or Frame of choice
Copy & Paste onto your canvas
Magic Wand, Selections, Modify, Expand by 5
Get your paper of choice, Selections, Invert & Hit delete on your keyboard
If you want to use a close up tube inside your frame do that now &
erase any parts hanging over as mine is just a guide
Adjust, Hue & Saturation
Both on zero
Dropshadow your frame
Get one of the Charms, Bloosms & Butterflies & Place them
where you wish
Dropshadow them as well
Take other Tube of choice & Place it where you wish
Dropshadow
Paper of choice, Click on the background layer, Enlarge
Layers, New Mask Layer, find your mask & apply
Merge, Merge Group
Grab some Doodles of choice & Place above your mask layer
but under your Frame
Dropshadow
Wordart of choice.
This is where I had a hard time choseing
Cause I liked both..LOL
Dropshadow
Add your Copywrite & Your Name
Resize to 85-90%
YAY!! You Are Done
Hope you enjoyed another Tut
This was written by me on Jan. 29th 2009

Tuesday, January 27, 2009

OMG!! Woot!! Another Award!!

OH MY OH MY!!!
Yet Another Award
I bout fell out of my recliner when I logged on
this Morning to find out that Doris over at Scraps Dimesions
had given me another award..Thank You Hun!!
Check her Fabby Blog out HERE

So I have the hard work of passing this on to 4 other designers & tut writers.
Geesh makes my brain work this morning...LOL

I'm passing it on to:
Karla over at Lacarolita's Designz
She makes some Awesome Scraps
Check her out HERE

It's also going to a Great Tut writer Lyn over at
Lyn Designz Tutorials go check her Fabby tuts over HERE

It's also going to another Fabby Tut writer Stayysee over
at Stayyseee Productions go check her Awesome Tuts out over HERE

And Last But Not Least a Crazy Friend Sylive over at
Sylly Creationz..Another Awesome Tut writer go check her out HERE

Sunday, January 25, 2009

U Got Me!!


Click Tag To Get Full View
You must have a working knowelege of PSP to do this tut
I am useing a FTU Scrap called Red Hot Romance from
Bluebird over at Bluebird's Blog, you can find the
Awesome Scrap HERE
Remember to leave a little Love, it only takes a few mins.
Thank You Hun.
I am useing the HOT HOT art of Ismael Rac
You must have a lisence to use his work & you
can obtain it over at MPT
Mask of choice, I think mine came from Zunna
The font I am useing is called Miss Packgope or one of choice
Another Easy Peasy Tut, Let's Do It!!
Open a New Image 700x700
Can crop & resize later
Take one of the Heart Frame's of choice
Copy & Paste on to your canvas, I enlarged mine some.
Take your Magic Wand, with shift down click inside your frame
and the bottom part as well, take your paper of choice
Copy & Paste, Selections, Invert & hit delete on your keyboard
Dropshadow your frame
Take tube of choice, copy & paste, move below frame
Erase any parts you don't want showing, duplicate, bring that one
above frame & erase the parts of the tube that your heart & ribbon
is showing.
Dropshadow the orignal
Now take a Bow of choice & Place where you wish
Dropshadow.
Now take some of the Flowers & Roses
Place where you wish, I put mine below my frame
Dropshadow them as well.
Click on the background layer, copy & paste paper
of choice, your going to have to enlarge it as well.
Layers, New Mask Layer, find your mask in the dropdown box
Merge, Merge Group
Add your Copywrite & Your Name
Yay!!! Your Done
This Tut was Written by Me on Jan. 25th 2009

Saturday, January 24, 2009

YAY!!! Another Award

OMG!!! I was in PURE Shock when I seen that I had received this award.
I have been so blessed to have such a WONDERFUL Blog Family.
The support that I have gotten for my work is amazing.
I didn't think my Tags would ever be worth to tut, but the wonderful Friends that
tell me that there wonderful is just GREAT. Thank You Everyone.

I got this award from 2 AMAZING Ladies...Thank You!!
The first one comes from Doris over at Scraps Dimension, you
can find her wonderful work HERE

The other one came from a Great Friend Kay over at
KayXclusive a Fabby Tut writer go check her out over
at her Blog HERE

Now I've got to pass this on to 4 more Fabby Ladies!!
That is a Great, Great Friend B you may know her from Blame Beaches Tuts
She has been such a patient person for teaching me PSP, I wouldn't have been able
to do it without her...BIG HUGS HUZZY!!...LOL
Go Check her out HERE

I'm also passing this on to another Great Friend Rachel.
You may know her work from Captivated Visions
A Fabby Scrap Designer go check her work out as well
You can find her HERE

The award is also going to another Fabby Friend, Tut writer, Word Art Maker as well
Lisa over at Lisa's Creative Clutter Too.
Go check her Blog over HERE

And last but not least it is going to Noeleen over at Designs By Irishlass
Another Great friend & Tut writer..Go check her out HERE

Wednesday, January 21, 2009

Step Into Spring

YAY!!
Found My Mojo..
Click Tag to view full Image.
I am using a Very Pretty FTU Scrap from
Arty-Pharty Scraps
It's called Step Into Spring
You can find it over on her Blog
Thank You Hun!!
Make sure you leave her some Love while downloading
It just takes a few mins.
Tube of Choice.
Again I'm useing another HOT Keith Garvey
you can find his work over at MPT
Font of Choice
I'm useing Charlotte Sans
Ready To Get Started?
Another Easy Peasy One
Let's Do It
Open a New Image 700x700
We can crop & resize later.
Get your Ellipse Tool
Set it on Circle, Line Style Solid
Width set on 15
Objects, Align, Center in Canvas
Convert To Raster Layer
Click in the middle with your Magic Wand
Selections, Modify, Expand by 5
Copy & Paste paper of choice
Selections, Invert, Hit Delete on your keyboard
Dropshado your circle
Take your tube of choice
Place it where you wish
Now take one of the bows place where you think
it looks best & erase any parts that makes it look like its
going around your tube.
Dropshadow both
Take some of the Flowers
Resize a little & Place them to the left top of the circle
or where you wish
Mine is just a guide
Dropshadow
Now take one of the Bead Strings
Place where you wish as well
Type some words on it if you wish as well
Dropshadow
Now grab some Flower Branchs of choice
Resize some
Place them over to the right of the circle
Move below your circle
Dropshadow
Grab another Single Flower
You will have to enlarge this
I think I enlarged it twice
useing 130
Move this to the bottom
Adjust, Blur, Gaussian Blur
Radius set to 2o
Than I went to Effects, Texture Effects & Weave
Gap Size~2
Width~10
Opac~5
Weave & Gap Color set to White
Add your Copywrite & Your Name
I resized mine to 85-90%
WOOT!!
Your Done
Hope you enjoyed another Tut
This Tut was written by me on Jan. 21st, 2009

Yet Another Award!!

Wow!!
I can't believe I got another award.
I got this award from Sylive from over
at Sylly Creationz.
She's an Awesome Friend & an Awesome Tut Writer
Thank You Nutter...LOL
You can find her HERE
Now I have to pass it on to 5 People
and Oh My Was This Hard to do since it seems like
everyone already has it.
I'm passing it on to 5 Great Tut Writer's & Scrap Designers
They are Zory over at Boomie's Scraps & Dreams
You can find her HERE
I'm also passing on to Doris over at
Scraps Dimension's
An Amazing Scrap Designer
You can check her Fabby Scraps over
on her Blog HERE
It is also going to Karla over at
Lacarolita's Designz
Fabby Scrap Designer as well
You can find her HERE
And another Amazing Scrap Designer is
Seachell.
Over at Seachell's Scrapz
You can find her Blog HERE
And Last BUT Not Least
An Awesome Tut writer & Great Friend
Noeleen over at Designs By IrishLass
You can find my Partner in Crime From Kreative Mindz

Tuesday, January 20, 2009

Just Some Ramblings!!

Hey Everyone!!!
No I haven't went AWOL...LOL
I had a very Emotinal Day yesterday. I found out one of my Old (well really not old for age) Home Care Clients died last week, she was only 50. Her family found her dead in her home.
I had worked with the Ladie for several years in a Nurseing Home, Plus took care of her when she found out she had Cancer on her Kidney & was very ill. She was a very Good Friend & was a Mother away from Mother since mine lives 2 hours away. I also had an interview to be a Nanny as I'm only working Part-Time as an in Home Care Giver for the Elderly & Handicapped in there homes. I will be away for most of the day today as well as her Ex-Boyfriend that I'm still good Friends with will be picking me up & we will be going to her Funeral. I'm still very very upset to think that something happened & she had to lay there & die by herself with no one with her. She had some MAJOR health issue & fell several times & busted her head open when I took care of her for 3 years so just to think the worse I'm the one that would do it. I get very, very, very attacthed to my Home Care Clients its a very Hard Job & Bless the people that do to it. I'm told everyday that I'm an Angel. Ok got to go cause I'm startig to cry. Hope Everyone Has A Great Week. Hope to be back Tutin soon, I fink maybe I've lost my Mojo as well. So if anyone finds it send it to me Please.
Hugs

Sunday, January 18, 2009

Just Peachy

Click Tag to get full View
You must have a knowlege of PSP to do this tut
I am useing a Fabby FTU Scrap
called Just Peachy from Laurie
over at Laurie Made Me Scraps
You can find it HERE
Thank You Hun
I'm useing the Beautiful art of Jennifer Janseko
you must have a lisence to use her art
and you can find her over at CILM
The Font I am useing is called
Carattere Rob
Mask of Choice
Ready to get this thing started?
Open a New Image 700x700
Can crop & resize later
Find the Frame you are wanting to use
Copy & Paste on Canvas
You will have to enlarge it since it's so small
Click inside it with your Magie Wand
Selections, Modify & Expand by 5
Copy & Paste Paper of choice
Selections, Invert & Hit Delete on
your keyboard
Move below your frame & Dropshadow your frame
Now take your tube of choice
Move below your frame & erase any parts showing
Dropshadow your tube
Now take the Fan, Resize
Copy & Paste it to the left side of your frame
Turn it to where you think it looks best
Dropshadow
Take the 2 Boys & Resize each a little smaller than the other
Place to the top left of your frame & make them look like
the belong together
Dropshadow both
Grab 2 different butterflys
Place them where you wish
as mine is just a guide
Dropshadow those as well
Now take one of the flowers paste it where you wish
Dropshadow it
Now click on your background
Copy & Paste paper of choice
Layers, New Mask Layer
Find your Mask
Merge, Merge Group
Duplicate it if you wish to make it look
darker.
Effect, Texture Effects, Weave
Gap Size~2
Width~10
Opac~5
Weave & Gap Color~White
Apply your Name and
Copywrite
Crop & Resize if you wish
I resized mine to 85-90%
Wholla!!
Thanks for trying another Tut
Hugs
This Tut was written by Jan. 2009

Saturday, January 17, 2009

Lollipop

Please Click Tag To Get Full Image
I am useing a FTU Scrap called Lollipop
from Seachell over at Seachell's Scrapz
Thanks Again Hun for another Awesome Freebie
You can find it HERE
I'm useing Another HOT Tube
of Elias Chatzoudis you can find
his art over at MPT HERE
The Font I am useing is
called Saginaw
Mask of choice
Alright, Let's Get Started
Open a New Image 700x700
You can crop & resize later
Open the Square Frame copy & paste onto your canvas
and Resize.
Click on the inside it with your Magic Wand
Selections, Modify & Expand by 5
Copy & Paste Paper of choice
Resize a little
Selections, Invert & Hit Delete on your keyboard
Now take your Tube of Choice
Copy & Paste onto your canvas
Move below your Frame & Duplicate
Move that one above your Frame & Erase any parts
you don't want hanging over
Dropshadow the Frame & Your Tube
Now take one of the ribbons with the bows
Resize & Erase any parts hanging over your Frame
Dropshadow
Now take the Flowers
Resize to likeing
Place on each bottom corner of your Frame
Dropshadow
Take the Love Charm
Resize it a little as well
Place to the Top Left Corner of your Frame
Dropshadow
Take the Lollipops
Copy & Paste to where you would like them
to the top right of your Frame
Resize them & Place to your likeing
Make sure you erase the sticks
Dropshadow
Over on your Layer Pallette
Click on the Background
Copy & Paste Paper of choice
Layers
New Mask Layer
Find your mask in the drop down box
and hit Ok
Merge, Merge Group
Now add your copywrite and
your Name
Resize 85-90%
YAY!!
Your Done...
Hugs
Tut was written by me
Jan. 2009

Thursday, January 15, 2009

Pretty In Pink

Wow!!
2 Tuts In One Night
Actually I found both of these Scraps earlier today
And just did something with them tonight.
This Tut is for Betty
A Dear Dear Friend of Mine
She LOVES Pink
Love Ya Lil Bits...HUGS
Yes I'm useing another FTU Scrap from
Bluey from Bluedream Designs.
What can I say she makes Awesome FTU Scraps
Thank You Hun
It's Called Flush With Love
You can find it HERE
I'm useing the work of Ismael Rac you must have a lisence
to use his work & you can find him at MPT.
I'm useing a Font called Kravitz Extra Thermal
And I used a Square Mask
Sorry don't remember where I got it from
Let's Do This Thing!
Open a New Image 700x700
We can crop & Resize later.
Copy & Paste Frame 2 & Resize
As mine is just a guide.
Take your Selections tool & draw
a square around the frame
Copy & Paste paper of choice
Selections, Invert & hit delete on your keyboard
Move your paper below you frame.
Copy & Paste your tube, move below your frame
Duplicate it & Move above your frame & Erase any parts hanging
over & as well to show the bow.
Dropshadow your frame & your bottom tube.
Now take your Love Word Charm 1
Copy & Paste on to your canvas & resize
Turn it to where you think it looks best
Place it to the left side of your frame at the bottom
Dropshadow
Take Love Pendant 3
Resize Place to the top right of your frame
Erase a part of it so it looks like its hanging there
Now take some Rose's resize them & Place below your Love Word charm
Look at mine for example
Dropshadow.
Take the Butterfly, resize & Place to the left top of your frame
Dropshadow.
Now click on your background, floodfill with color of choice
Layer's, New Mask Layer, Look for your mask
in the drop down box & Apply
Merge, Merge Group
Now apply your Copywrite & Your name
Resize to 85-95%
YAY!!
Your Done
Hope you enjoyed
Hugs

Be My Valentine

Another Tut! YAY!!!
I'm useing an Awesome FTU Scrap from
Bluey over at Bluedream Designs called
Valentine you can find it HERE
Be sure to leave some love while downloading
Thank You Hun!!
I'm also useing Dominic Marco you must
have a license to use his art & you can
find it over at CILM.
The Font I'm useing is
called 1 Snappy DNA & Mask of choice
I used a round one.
Ready? Get Comfy
Let's get this thing on a roll.
Open a New Image 700x700
Copy & Paste one of your frames & Resize
Click in the middle of your frame with your Magic
Wand & Selections, Expand by 5
Copy & Paste Paper of Choice
Now take your tube of choice, move below the frame
Duplicate & move it above your frame & erase
any parts that you don't want showing on both tubes.
Dropshadow your bottom tube & your frame.
Take Charm 1 & Resize a little & Place to the left handside
of your frame & dropshadow.
Take your Flowers & Rose's of choice & Place them to the
Rightside of your tube & Place how you would like
Dropshadow.
Now take the Pearls of choice, resize a bit
and move to either side of your frame & move below the frame.
Dropshadow, Duplicate & Image, Mirror.
Do the same with some Diamond Doodles as well
Take Paper of choice Copy & Paste on your background
Apply your mask of choice.
I than went to Effects, Texture Effects, Weave
Gap Size~2
Width~10
Opac~5
Weave & Gap Color~White
Apply your Copywrite
Your name
Crop & Resize to 85-90%
Wholla Your Done
Hope you enjoyed another Tut of Mine
Hugs

Tuesday, January 13, 2009

Love You

Another Tut For You Today!!
Get Comfy Again..LOL
I am useing a FTU Kit from Simply Sensational Scraps
called Sweethearts you can find it
Thank You Girls
I'm also useing the art of Elias Chatzoudis
you can find him over at MPT.
Font & Mask of choice
I'm using Satisfaction
Open a New Image 700x700
Can Crop & Resize later
Open Frame 1, Copy & Paste on to your canvas
Resize, Click insdie with your Magic Wand, Expand by 5
Copy & Paste Paper of choice
Move below your frame
Copy & Paste your tube you are useing
Move below the Frame & Duplicate it
Move the Duplicated one above your frame & erase any parts
hanging over along with the origanl one as well.
Dropshadow your Tube & Your Frame.
Take one of the Wraps & Place over your Frame & Erase
any parts that you don't want hanging over.
Dropshadow it
Now grab the Balloons & Copy, Paste them
Move them below the Wrap.
Dropshadow
Grab some Flowers, Copy & Paste them place along the
bottom of your frame.
Dropshadow
Now click on your Background
Copy & Paste Paper of choice & Apply your mask.
I flood filled mine, Applied my mask than Duplicated it to
make it darker.
Than went to Effects, Texture Effects, Weave
Gap Size~2
Width~10
Opac~5
Weave & Gap Color~White
Now add your Copywrite, Your Name
Resize to about 85%
Wholla!!
Your Done
Hope you Enjoyed It
Hugs

For Boys Only

Here's Another Tut For You!!
I am useing a FTU Kit called All Teen from Bel Vidotti Scraps
You can find it HERE
Make sure you leave some love.
Thank You Hun.
I'm useing another HOT Tube of Keith Garvey
You must have a lisence to use his art & you
can find it over at MPT.
I'm useing another Mask of Weescotslass
#209 & you can find it HERE
Thank You So Much for all your Mask
The Font I'm useing is Water Brush Rob or
Font of choice.
Let's Do This.
Open a New Image 700x700 you can crop & resize later.
Find Pocket 3, copy & paste onto your Canvas & Resize.
Image, Rotate, Free Rotate, Right 15 degrees.
Move it over to your right side of your canvas a little
Layers, Duplicat, Image, Mirror
Move below your first one
Dropshadow
V~2
H~2
Opac~60
Blur~8
Color~Black
Now on your other Pocket change the V & H to minus
Now find Stitch 1, Copy & Paste onto your top pocket.
Dropshadow of choice.
Duplicate & Move it over onto your other pocket
Find LaceUp 2, Copy & Paste onto your canvas & Resize.
Place in the middle to make it look like its holding the 2 together.
Dropshadow
Take the Flowers of choice, Resize & Place them below your
Pockets to make them look like there comeing out of the top of them.
Place where you wish
Dropshadow
Find the Element that looks like its on a stick.
Erase the stick part & Copy & Paste to the left hand side of your pocket.
Dropshadow.
Now take the For Only Boys Button place to the right side
down at the bottom.
Dropshadow
Take one of the Hangers & Place it to the right hand side as well
Make it look like its holdeing the button in place & erase part of the chain
that is hanging over.
Take the Staples & Place it to the top right of the pocket.
Erase one & make it look like its holding your chain in place
You can place one to the bottom left of your left pocket as well to make it
look like its holding the pocket in place
Dropshadow
Copy & Paste Tube of choice
Dropshadow
Now Click on your background layer.
Copy & Paste Paper of choice
Layers, New Mask Layer, From Image
Find your mask & Apply
Add your Copywrite & Your Name
Woot!! Your Done
Hope you enjoyed another Tut..
Hugs

Monday, January 12, 2009

Kiss Me!!

My Yet Another Tut!!
I'm useing another Awesome FTU Kit from Doris over at
Scraps Dimensions you can find it HERE
Thank You Again Hun.
And Yes another Template from Missy #128
You can find it HERE
Thanks Babe.
I'm using the art of Dominic Marco
you can find him over at CILM an
you must have a license to use his art.
Font of Choice, I'm useing 1 Snappy DNA
Mask of choice as well.
Ready, Get Comfy again...LOL
It's another Easy Peasy one.
Open the Template & Over on your Layer Palette click on the backgroud
Go to Image, Canvas Size 650x650, Flood Fill White.
Click on the Circle Layer, Selections, Select All, Float & Defloat
Copy & Paste Paper of choice.
Selections, Invert & Delete on your keyboard
Dropshadow
V~1
H~2
Opac~70
Blur~10
Color~Black
On you Layer Palette follow the same steps as above.
But Dropshadow them
V~0
H~0
Opac~70
Blur~10
Color~Black
Now for your Lips..LOL
Selections, Select All, Float, Defloar, New Raster Layer
Flood Fill Color of Choice
DropShadow them
V~1
H~2
Opac~55
Blur~5
Color~Black
Than go back & change the V & H to minus 1 & 2
Adjust, Add/Remove Noise
Radius set to 70%
Now Click on the Kiss Me layer, Selections, Select All, Float, Defloat
New Raster Layer, Flood Fill White.
Do the same for the top Kiss Me as well.
Dropshadow as wish
Add your tube & Dropshadow
Resize & Add any Embleshments of choice
Dropshadow of choice as well
As my Tut is just a guide
Click on your background layer again add
Mask of choice
Add your Copywrite & Name
Wholla!!
Your Done
Thanks for trying another Tut
Hugs

Sunday, January 11, 2009

Sexy Valentine

Another Tut..Wow!!
2 in 1 day.
I am useing a FTU kit called Valentine Angel from
Seachell over at Seachells Scrapz you can find it
I am useing the HOT art of Elias Chatzoudis & you can find
him over at MPT & you must have a lisence to use him.
Font of choice or the one I'm useing & its called
A&S Snapper Script & Mask of choice.
Open up a new Image 700x700 you can crop & resize later.
Copy & Paste Square Frame on canvas & resize.
With your Magic Wand click inside the Frame & Selections, Modify & Expand by 5.
Now Copy & Paste Paper of choice, Selections, Invert & Hit Delete on your keyboard
Select none & Move the paper below Frame layer in your Palette.
Dropshadow Frame
V~1
H~2
Opac~70
Blur~10
Color~Black
Take Bow of choice, Copy & Paste on to your frame & postion as you wish
Resize as you wish & postion at the bottom of your frame.
Erase any parts hanging over & Dropshadow of your choice
Take one of you close up tubes & copy & paste it inside your frame
Move below your frame & erase any parts hanging out.
Adjust, Hue & Saturation, Colorize & both set on zero
Copy & Paste your other tube & Mirror it the other derection
Resize any other embleshments you wish to use & place them where you would like.
Add your Copywrite, Name & Resize to about 85-90%
Hope you enjoyed another Tut.
Hugs

Happiness


Yay!! Another Tut.
I found this scrap the other day & just loved the colors.
I played with it for 3 hours the other night without a template & Trashed 3.
So I found a Template to use.
Wish I could do these without them, but OH Well.


I'm useing a Very Bright FTU Scrap called Happiness hence the name from Boomie over
at Boomie's Scraps & Dreams. Thank You Hun!
You can find her HERE


I'm also useing another one of Missy's Template's #78 over at her site
Thank You Again Hun!!


I'm also useing another HOT Tube of Keith Garvey's
you must have a license to use his work & you can find it over
at MPT.

You will also need Mura Meister Copies
&
Font of choice, I'm useing The NautiGal

Ready? Grab something to drink & get comfy, its another Easy Peasy Tut.

Open your Template & on the Background Layer

Image, Canvas Size 550x550.
Flood fill the rest of it White.

Over on your Layer Pallette Click on the Large Circle.
Selections, Select All, Float & Defloat, Copy & Paste Paper of Choice.
Dropshadow, V~1, H~2, Opac~70, Blur~10 Color~Black

Click on the Small Circle over on the Pallette, same steps as above, Copy & Paste Paper of choice & same Dropshadow.

On the Layer Pallette, do the same for the Lines, or flood fill color of choice from your tube or one of the Papers.
Dropshadow the Lines
V~0
H~0
Opac~70
Blur~10
Color~Black

Over on the Layer Pallette, Click with your Magic Wand

Frame Background, Copy & Paste Paper of choice or you can also flood fill with color of choice.

As mine is just a guide.

Now for the Frame.
Selections, Select All, Float & Defloat, copy & paste paper of choice.
Dropshadow it
V~2
H~2
Opac~55
Blur~5
Color~Black

Now take Bowflower of choice, resize it to your choice.
Effect, Plug In, Mura Meister Copies

Number -12, ShiftX-50, ShiftY-50, Angle-0, Rotation-100, Phase-minus 25, Cycle-100, Attenuation-0, Scale-100, Tile Gap-0, Thru BG Range-0, ThruBG Smooth-30, Fade Out-0, Encircle. Duplicate & Move below the origanle. Adjust, Blur, Gaussian Blur, Radius 20.
Resize it to the size you wish & move it below everything.
Duplicate, Adjust, Blur, Gaussian Blur, Radius set to 20.
Move below the orignal & Duplicat it if you wish to make it brighter.
I think I duplicated mine 3 times.

Resize & Add your tube of choice.
Add some Embleshments & Dropshadow them as well.

Add your Copywirte & Name & Save
Thanks again for trying one of my Tuts
Hugs

Saturday, January 10, 2009

OMG!! Another Award..I Can't Believe It!!

OMG!!!
I CAN NOT BELIEVE IT!!
I have received yet another award.
This award comes from a Good Friend Kay from over at
Kay Xclusive. Go check her out. She has some Awesome Tuts & Templates.
She is HERE
Thank You Kay...HUGS.
I'm suppose to pass this to 5 people.
The Lovely Award is going to.
Doris of Scraps Dimensions a Wonderful Scrap Maker you can find her HERE
Sylive of Sylly Creationz, she is an Old & Crazy Friend & A Fabby Tut writer you can
find her HERE
Kelly of Kelly's Kreations, she has Fabby Tuts as well & is also an Awesome Scrapper.
You can find her HERE
Karla of Lacarolita's Designz, she's a new Friend & Makes the Prettiest Scraps.
You can find her HERE
And last BUT not Least!!
Loyal of A Dash of Whimsical Creations. She seems to be an Awesome person that wants me to be on her Creative Team.
She has some Cute scraps as well.
You can find her HERE
Thank You Again Kay, I am VERY VERY HONERED!!!

Friday, January 9, 2009

Girly

Yay!! Another Tut
I'm useing the Cute work of Pinuptoons.
You must have a license to use his work & you can purchase that at CILM.
I'm useing a Template #48 of Denz Designz & you can find it
over at her site Here.
Please Leave some love while downloading.
Thank You Denny.
I'm useing a FTU Scrap called Girly Grunge Add On
of Butterfly Kisses & you can find it under Freebies.
The Mask I'm useing is from Weescotslass
Mask 223 & you can find it Here
Thank You Hun.
Font of choice or the one I'm useing
Maiandra
Ok ready to do this?
Open the Template & Delete the Copywrite Layer.
Click on Rectangle Back & with the Rectangle Tool, Line Width 5, Draw out a Rectangle the same size as that one.
Convert to Raster Layer & with you Magic Wand click inside it, Copy & Paste Paper of choice.
Do the same for the Middle Rectangle.
Flood fill it with color of choice.
Adjust, Add/Remove Noise.
Random checked, Monochrome checked, Noise 70%
Dropshadow the rectangles you drew out.
V~1
H~2
Opac~70
Blur~10
Color~Black
Click on Rectangle Top, Selections, Select All, Float & Defloat.
Copy & Paste Paper of choice.
Dropshadow it the same as above.
Now here's the tricky part.
X out that step you just did with the Rectangle Top cause I thought it was 2 different parts.
So again Rectangle Tool & Draw out a Rectangle the same size as that little inside one.
Same Settings as before.
Convert to Raster, Copy & Paste Paper of choice.
Grab your Magic Wand.
Click on Shape Back, Copy & Paste Paper of choice or Flood Fill it Color of choice.
Effects, Texture Effects, Blinds
Width~4
Opac~40
Color~White
Horizontal & Light from left/top checked
Effect, Texture Effects, Blinds
Now Uncheck Horizontal.
Do the same steps for the other 2.
Go & Click on Shape Frame with Your Magic Wand.
Selections, Modify, Expand by 3.
Copy & Paste your tubes of choice in all 3 Circles
Following the same steps.
Dropshadow those as you wish.
Copy & Paste your tube of choice & move it below that middle circle.
Dropshadow it as well.
Resize & Copy & Paste any Embleshments of choice.
Add a New Raster Layer & Move it below everything.
Copy & Paste Paper of choice.
Layers, New Mask Layer.
And find your mask of choice.
Over on your Layer Palatte Merge, Merge Group.
Add your Copywrite & Your Name
Wholla Your Done
Resize if you wish.
Hope you enjoyed another tut.
Hugs

I Just Want To Say!!!

I want to Thank All My Supporters. You all are the best. I started this blog not thinking that I could write Tuts. Beaches Thank You so much for helping me make this blog possible & I know that I've been a Pain In Your A** but I couldn't have done this without you. Love Ya. Hope everyone has A Good Weekend. Hugs

Thursday, January 8, 2009

Sexy Romantic Tut

This tut was written by me on January 8th, 2009

I am useing a FTU Scrap by Seachell over at Seachelle Scrapz. You can find her Awesome Creations over at her site Here. Thank You for your Awesome Freebie. Please remember to leave some love while downloading.

I'm also useing Template 6 from Marcia over at Babe's Designz Here. Please leave a little love for her as well. Thank You Hun.

I'm using the HOT work of Ismael Rac, you must have a lisence to use his work & you can find it over at MPT Here.

The Font I am using is Will & Grace or you can use font of choice.

Ready? Get Comfy. Another Easy Peasy Tut.

Open Template 6 & Delete her Copywrite Layer. Over in the Layers Palette Click on Rec. 1. Selections, Select All, Float & Defloat. Copy & Paste Paper 5. Selections, Invert & Delete on your keyboard. Delete the Rec. 1 & Dropshadow V~1, H~2, Opac~70, Blur~10 & Color Black.

Over on the Layer Palette, Highlight your Rec. 2. Same steps as above & Copy & Paste Paper 12 & Postion how you like. Delete that Rec. Layer & Dropshadow as above as well.

Click on your Large Rec. Follow same steps as well & Copy & Paste Paper 7. Delete that Rec Layer & again Dropshadow as above.

Now Click on the Back Frame & Copy & Paste Paper 8 & Postion as you wish. Follow the same steps as you did before. No Dropshadow.

Click on the Main Frame. Selections, Select All, Float & Defloat, Copy & Paste Paper 1o. You don't have to use the same Papers if you don't want to as mine is just a guide. Delete the Frame & Dropshadow it, V~2, H~2, Opac~70, Blur~10 & Color Black.

Copy & Paste the Close up tube of choice & Postion it in the middle of the frame & Erase any parts you dont want showing. Adjust, Hue & Saturation, Colorize & both on zero.

Copy & Paste your main tube Postion it as you wish, Dropshadow it, V minus 2, H~3, Opac~60, Blur~8 & Color Black.

Add your Copywrite, your name & Yay!! Your Done.
Hope you enjoyed it....Hugs

Wednesday, January 7, 2009

Yay!! My First Award


This Lovely Award was given to me from Doris over at Scraps Dimensions.

You can find her blog Here.

I'm passing it onto:

Blame Beaches Tutorials

Noeleen of Designs By IrishLass

Kay of KayXclusive

Oh So Betty Tut!!


This tut was written by me on January 7th, 2009

I used the FTU Scrap Oh So Betty by Stevie over at Nightbirds Enchanted Scrap Haven. Thank You Stevie. You can find it Here. Leave some Love while downloading.


I used mask #84 by Weescotslass Here. Thank You for all your great masks.
I aslo used Armando Huerta of MPT, you must have a lisence to use his work & you can find it Here.


Font used it Waterbrush Rob or Font of choice.


Ok ready to make a tag? Grab something to drink & make yourself comfy.


Open a new 700 x 700 image.


Open the scrapkit & find Black frame & copy & paste it on to your canvas. Magic wand, Selections & Modify & expand by 5, copy & paste paper of choice, selections, invert & delete on your keyboard & move it below your frame & do this for the second square as well. Dropshadow your frame, V-1, H-1, Opac-70, Blur 10, Color Black.


Now take your tube of choice copy & paste it, duplicate it & move below your frame & erase any part that you want to make it look like its going thru the frame. Dropshadow the orignal, V-2, H-3, Opac-55, Blur-5, & Color Black.


Now take your Roses & put them to the left of your frame below your tube & rotate them to your likeing to make it look like she's stepping on them. Dropshadow as before.


Now take the record, resize to your likeing place to the right of the frame but under it & Dropshadow it as before as well.


Now take heart of choice & place to the right but above the frame. Look at my tag for refrence. Dropshadow it as well same as above.
Now take the bigger roses of choice & place them to the left of your frame underneath it & place to the top. Dropshadow V-2, H minus 2, Opac 55, Blur 5 & Color Black.


Take a Bow color of choice, theres several to chose from & place it on your frame to the right, so its not covering up your tube move it below the top tube. Dropshadow, V-2, H-2, Opac-55, Blur-5 & Color Black.


Add your copywrite & your name & save.


Hope you enjoyed another tut. Wasn't going to tut it but I thought it was another easy one so I thought you would enjoy it....Hugs

Tuesday, January 6, 2009

Natural Beauty Tut


This tut was writen by me on January 6th 2009.

Thank You Rachel for helping me name this tut.

I used a FTU Scrap from Doris over at Scraps Dimension called Mustard Palette & you can find it Here. Please remember to say Thank You while downloading the scrap it only takes a few mins. Thank You Doris


I also used Template 120 of Missy's over at Divine Intentions. You can find it Here. Please remember to leave her some love as well. Thank You Missy.


I used the Beautiful work of Barbara Jensen.


Font is called Shishoni Brush or font of choice.

You will also need Mura Meister Copies.


Ok ready to make a tag? Let's do it.


Open your template & over on your Layer Palette delete the copywrite layer.
Click on the background over in your Layer Palette & Image, Canvas Size 650 x 650, Flood Fill White.

Click on your Circle Layer, Selections, Select All, Float & Defloat. Copy & Paste Paper 1, Selections, Invert & hit delete on your keyboard, select none. Delete your circle layer. Dropshadow Raster 1. V~1, H~1 Opac~70, Blur~10, Color Black


Again over on your Layer Palette. Highlight the thin rectangle. Selections, Select All, Float & Defloat. Copy & Paste Paper 2. Selections, Invert & Delete on your keyboard. Select None. Delete thin rectangle layer & Dropshadow Raster 2 same as you did before.


Click on the Large Rectangle. Selections, Select All, Float & Defloat. Copy & Paste Paper 3. Selections, Invert & Delete again. Delete the Large Rectangle layer over in the Layer Palette & Dropshadow Raster 3. V~2, H~2, Opac~70, Blur~10 & Color~Black.


Over on your Layer Palette click the Smaller Rectangle. Selections, Select All, Float & Defloat. Copy & Paster Paper 1. You know the drill, Invert & Delete. Delete that layer & Dropshadow Raster 4 V~2, H~2, Opac~70, Blur~10, Color Black.

For the other Small Rectangle. Selections, Select All, Float, Defloat. New Raster Layer & Flood Fill Black. Dropshadow it. V~2, H~2, Opac~55, Blur~5, Color~Black.


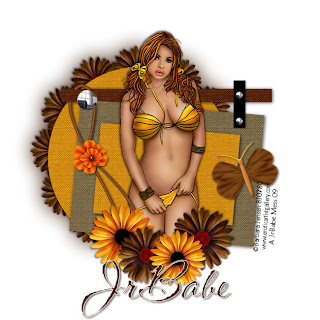
Copy & Paste your tube, Place where you wish & Dropshadow to your likeing

Add any Emblishments of Choice & Dropshadow them to your likeing as well. As my tut is only a guide.


Take the Brown Flower 2 & Resize to your likeing. Effects, Mura Meister Copies.


Number -12, ShiftX-50, ShiftY-50, Angle-0, Rotation-100, Phase-minus 25, Cycle-100, Attenuation-0, Scale-100, Tile Gap-0, Thru BG Range-0, ThruBG Smooth-30, Fade Out-0, Encircle. Duplicate & Move below the origanle. Adjust, Blur, Gaussian Blur, Radius 20. Hope that makes since. I'm not for sure how to show you the image. I'm still learning.


Dropshadow the oringal. Cirlce of flowers V minus 2, H minus 2, Opac-55, Blur-5 & Color Black.


Open the String Flower 1, Resize to your likeing & Copy & Paste it. Look at my tag for refrence & Dropshadow it, V-2, H-2, Opac-55, Blur-5 & Color Black. Move it below the Buttons Layer & Erase any parts to make it look like its hanging. If you would like the Flower to look like its bigger like mine, open one of the others & Crop it & Place it over the other one & Dropshadow it as above.


Resize one of the Butterfly's of Choice & Place it to the Right or where ever you would like & Dropshadow it as well.


WHEW & Your All Done!!
Add your Copywrite, Name & Crop to your likeing.
Thanks for trying another one of my Tuts...Hugs

Monday, January 5, 2009

Preppy Girl!! This tut was writen by me on January 5th 2009.
I used a FTU Scrap from Lacarolita's Designz Here
Thank You For The Awesome Scrap, make sure you leave her some love while downloading it.
And I also used Template 10 from Babe's Designz Here
Thank You for the awesome Templates.
I also used the HOT art of Keith Garvey & you can find his work over at MPT Here
Font of Choice or the one I used is called Creative Power, can't remember where I found it.
Ok here it goes...Easy Peasy!!
Open your template & delete the copywrite layer.Over on layers, Selections-Select All-Float & DefloatCopy & Paste Paper 7, Invert & hit delete on your keyboard.Dropshadow 1, 1, 70, 10Delete the circle layer.
Over on your layer platte click on rectangle 1.Selections-Select All-Float & Defloat & copy & paste paper 2 & resize to your likeing.Duplicate it & move below orignal & got to adjust, blur, gaussian blur, radius 20 & resize 103% twice, than go to effects, texture effects, weave & apply these settings
Gap Size 1Width 10
Opacity 4,Weave & Gap Color White,Dropshadow the orignal with the same settings as before.Delete rectangle 1.
Again over on layer platte click on rectangle 2.Selections-Selection All-Float & Defloat & copy & paste paper 3, resize to your likeing.Dropshadow again as before.Delte rectangle 2.Now again over on your layer platte.Click on your stitches.Selections-Select All-Float & DefloatNew Raster layer & flood fill white.One more time over on your layers click on Dot Circles & copy & paste paper 5
Invert & Delte on your keyboard.
You can leave these black if you wish.
Dropshadow 2, 2, 55 & 5
Now add your flowers, heart & bow.
You can add any other elements if you wish.
Dropshadow them as above as well.
Hope you found my first tut easy to follow.
Hugs...JrBabe

Hello & Welcome To My Blog!!

Wow!!
Didn't ever think I would be starting a blog. But I found a Scrap that I loved & had to do something with it. I never thought that I was good at doing tuts but this one I had to tut. I can't ever really do a tag without a tut but I have found a love of doing tags useing templates soooo I think I might try this tut thing. So here's my first one, don't laugh cause I really don't know what I'm doing yet. So I hope you like it...Hugs