Friday, February 27, 2009

Clover's Daydream

Another Quciky for you today!!
Click on tag to get full view
You must have a working knowledge of Psp to do this tut

I am using the Awesome Work of Barbara Jensen
You must have a license to use her work
You may do so HERE

The FTU Scrap Kit & Mask came from Sabre over
at Quill & Parchment
Make sure you leave some love while downloading
Thank You Hun for the Awesome Scrap
Mwah!!

Let's Do This

Open a new 700x700 Canvas
Crop/Resize later

Floodfill with a color from your tube or use
the paper that is included in the kit
Layer's/New Mask Layer
Merge, Merge Group

Grab the Clover Frame
Copy/Paste & Resize a little
Dropshadow your frame
Flood fill it with color of choice
Effects/Weave & with these settings
Gap Size~1
Width~7
Opac~1
Colors~White

Get the rest of the embleshments
Place them where you wish
Dropshadow

Wholla!!

Add your copywrite & Your Name
Resize 85-90%

This Tut was written by me on Feb. 27th 2009
Any resmeblence to any other tut is coincidental


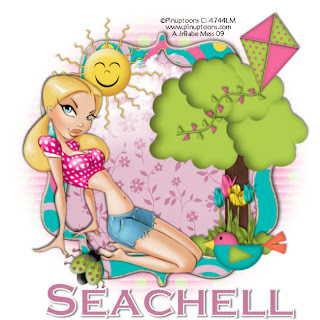
Spring Time

Got another Spring Tut!!

Click Tag to get full view
You must have a working knowledge of Psp to do this tut

I am useing the Cute work of Pinuptoons
You must have a license to use this work
you can get it over at CILM

I am useing another FTU scrap from Seachell's Scrapz
called Spring Time HERE
Make sure you leave her some love while downloading
Thank You Hun for all your awesome Freebies
Mwah!!

Font of choice, I am useing Copperplate Gothic Bold
and Mask of choice

Ready to get this thing started? Get Comfy!!

Open a new Canvas 700x700
Crop/Resize later

Find a frame of choice
Copy/Paste
Magic Wand & Expand by 5
Grab a paper of choice
Copy/Paste
Selections/Invert/Delete on your keyboard
Dropshadow your frame

Now get your tube of choice place where you wish
Dropshadow

Grab the tree, resize place it where you would like
Dropshadow

If you want to use some clouds place them below your tree
Find a kite you are wanting to use & Place
it on top of the tree
Dropshadow

Grab the sun, Got to make it look bright don't we?
Light Dropshadow

Now grab some flowers place them in front of the tree
Dropshadow

Now find the bird & place those on top of the flowers
I mirrored mine to make it look like its looking at the girl
Its up to you, mine is just a guide
Dropshadow it

If you would like a little Lady Bug, Place it where you wish
Dropshadow

Click on your background layer
Find the paper you are going to use
Layer's/New Mask layer/Find your mask
Merge/Merge Group

Your Done!!
Easy Peasy!!

Now add your copywrite & Your Name
Resize 85-90%

This tut was written by me on Feb. 27th 2009
Resemblance to any other tut is purely coincidental

Another Blog Award!!

Wow!!
These Awards just keep comeing
I got this Fabby Award from a Good Friend Lisa
She is an awesome, Tut writer & Word Art Maker
You can find her Blog HERE
Thank You Sweetie!! Mwah


Now I have to pass this on to 5 people
They are going to:
Doris
Kelly
Lacarolita's
Seachell's
Misfits

Tuesday, February 24, 2009

April Showers

I got another Tut for you today!
I know its alittle early but I'm so ready for Spring

Click Tag to get full view
You must have a working knowledege of PSP
to do this tut

I am useing the Beautiful work of Barbara Jensen
You must have a license to use her work
and you can get it HERE

Mask & Font of choice
For the Font I am useing 2 Peas Mister Giggles
The mask again comes from Weescotslass
#84 HERE
Thank You Again Sweetie!!


The FTU Scrap Kit came from
Kitzz Kreationz called Springtime
and you can get it HERE
Very Beautiful Kit..Make sure you leave
some Love
Thank You Hun!!

Let's get this thing started


Open a new canvas 700x700
Crop/Resize later


Find a frame of choice
Copy/Paste onto canvas
I enlarged mine some
Magic Wand, Expand by 5
Find the paper you are wanting to use
Selections, Invert, Hit delete on your keyboard

Move below your frame
Now you will have to click inside part of the
flowers to your left in order to get your paper
in those little area's, I expanded them by 10
Dropshadow your frame


Find your tube of choice
Place it where you think it looks best
Dropshadow


Find the wording you are going to use
Place it where you think it looks best as well
Dropshadow


Grab the little frog
Resize some
Place it to the left side of your wording
if you place yours where mine is
Mine is just a guide
Dropshadow it


Find some Butterfly's or any other emblishments of choice
Place them where you wish
Dropshadow them


Find some Tulips
Place them to the right side
of your wording
Dropshadow


Find the ribbon
Place it in the right top corner
Dropshadow


Click on the background layer
Copy/Paste a paper of choice
Layers, New Mask layer
Find your mask
Merge, Merge Group


WOOT!!
Your done


Now put your copywrite & your name on it
Resize 85-90%


This Tut was written by me on Feb. 24th 2009
Resemblance to anyother tut is coincidental


Rock Star

Another Tut!!
Click on tag to get full view
You must have a working knowledge of PSP
to do this tut

I am useing the Awesome HOT work of Ismael Rac
You must have a license to use his work
You can get it over at MPT HERE

I am useing a FTU Scrap from Yvette called
Girlz Rock you can get it HERE
Make sure you leave some LOVE while
downloading it only takes a few
Thank You Sweetie for shareing your Awesome
Scraps!!

I am also useing one Paper from Wicked Scraps
from a FTU scrap called Finish Line
You can get it HERE
Thank You Hun!!

Template comes from Teresa's Scraps
You can find it HERE
It's #6
Thank You for your share's as well!!

Mask of choice I am useing
Mask #84 from Weescotslass
Thank You Again Chelle!! Mwah
You can get it HERE

The Font I am useing is called
Arid ITC TT

Ready to get this started? After gathering all that stuff
Sorry

Find your Template
Delete the watermark
Click on Circle 2
Selections, Select All, Float & Defloat
Find paper of choice
Selections, Invert, Hit Delete on your keyboard
Dropshadow

Do this with the rest of the layers as well
Useing paper's of choice
as mine is just a guide

For the star in your larger circle
Click on that layer
Grab your magic wand, expand by 5
Copy/Paste paper of choice
Selections, Invert, Delete on your keyboard
Move the paper below the circle
I added the weave effect
with settings at
Gap Size~2
Width~7
Opac~1
Color~Black

On the stars I added Noise
Random~Checked
Noise~35
Monochrome~Checked

Add your tubes of choice to the frames
as well as a paper of choice to the backgrounds
Dropshadow your tubes & frames

Add your main tube
Postions where you like
Dropshadow

Add any other embleshments of choice as well

Click on the background over in your
layer pallette find another paper of choice
Layers, New Mask Layer find the mask
that you are going to use, Apply
Merge, Merge Group

Now add your copywrite & your name
Wholla!!
Your done
Hope you enjoyed

This Tut was written by Me on Feb. 24th 2009

Monday, February 23, 2009

Another Award!!!

Wow!!
Got another Awesome Award from Bright
She is a new Tut writer & is doing a Fabby Job
Thank You Hun for this award just to sweet of you
Go check out her Tuts HERE

Friday, February 20, 2009

I Feel Like I'm At The Grammys!!

Another Award Today!!
I got this award from Noeleen
Thank You Hun...Mwah!!

The Premio Dardos award acknowledges the values that every blogger shows in their effort to transmit cultural, ethical, literary, and personal values every day.

The rules are:
1. Accept the award, post it on your blog together with the name of the person that has granted the award and his or her blog link
2. Pass the award to other 15 blogs that are worthy of this acknowledgment.
Remember to contact each of them to let them know they have been chosen for this award.

It's going to be hard to pass this onto 15 other blogs that don't already have it
But here it goes
Doris
Stayyseee
Kay
Lyn
Sylvie
Chaotic House
Heather
Lacarolita's
Beaches
Lisa
Dawn
Jannie
Pooker
Kelly
Bright
Whew I did it, I know some of you already have it
but you all deserve it..
Love & Hugs


Wow!! Two New Awards


WooHoo!! Two New Awards
The Friends award comes from Dawn and
My Very Good Friend Beaches as well as Lisa
This is the most valuable award that I have received as of yet.
Thank You Both Mwah!!

This seal is given to the blogs which are very
charming. These bloggers, aim to find and be
friends. They are not interested in self promotion.
This hope is that this trophy when the links are
cut, even more friendships are propagated.
Give the trophy to eight bloggers, who must
choose eight other bloggers and add this text
with your trophy. I would like to pass this award
to the following blogger friends:
The First award also comes from Beaches
Thank You MUH Haggie...LOL
The Rules are:

1. Display the image of the stamp"Look How Cool Blog"
you just won
2. Post the blog link you provided
3. Indicate your choice of 10 blogs
4. Let them know
5. Post the Rules
6. Check there blogs to see if they posted the prize
and followed the rules

I am giveing it to the same 8 blogs above plus
these other 2:
Hope you all enjoy the awards
all of you deserve them
Love & Hugs
JrBabe


Thursday, February 19, 2009

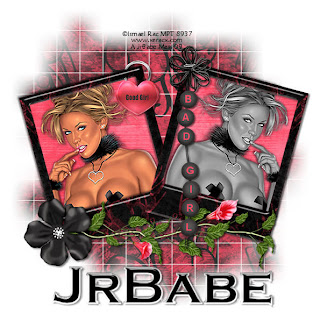
Good Girl-Bad Girl


Got another tut for you!!
A Good Friend Teezer did this tag &
I asked her if I could use it as a guide & Tut it
Thank You Sweetie!!

Click Tag to get full view

You must have a working knowlege of psp to do this tut

I am useing the work of Ismael Rac
You can get that over at MPT
You must have a license to use his work

FTU Scrapkit from Bea over at
Bea Creations called Good or Bad
You can find it HERE
Remember to leave some love
It only takes a few mins while downloading
Thank You Hun!!

Font of choice, I am useing Copperplate Gothic Bold
Mask of choice or the one I am useing
From Weescotslass #84
Find it HERE
Thank You again Hun!!

You will also need Lokias Software Gel Filter (optional)

Ready to get started?
I'm not let me get some more coffee..LOL

Open a new 700x700 canvas
Find Paper 5 or one of choice
Copy/Paste onto canvas
Layers/New Mask layer & find your mask
Merge/Merge Group

Find Frame 4, Selections, Select All, Float & Defloat
Get Paper 5 or one of choice
Copy/Paste on your frame
Selections, Invert & Hit delete on your keyboard
Merge, Merge Visable
Copy & paste it onto your canvas
Resize to your likeing
Image, Rotate, Free Rotate, Left, 15
Layer's, Duplicate, Image, Mirror
Ok Now here is the hard part (kinda..not really)
Effects, Find your Gel Filter
I just kinda played around with my settings till I found
something that looked right
Mine are
Bevel Width~10
Bevel Depth~50
Color Overlay~Unchecked
Color~White
Color Opac~100
Highlight~White
Shadow~10
Highlight Opac~50
Shadow Opac~50
Hope that makes sense
You will see what I mean when you open it
Do the same for the other frame

Get your Magic Wand click inside frame
Selections, Modify, Expand by 5
Find Paper of choice
Copy/Paste
Selections, Invert, Delete on your keyboard
Do the same with your other frame

Now find your tube of choice
Magic Wand again
Selections, Modify, Expand by 5
Copy/Paste, Place where you wish
Selections, Invert, & again hit delete on your keyboard
Do the same with your other frame & mirror it if you wish
I turned mine black
The way you do that is
Adjust, Hue/Saturation, Both set on zero
Dropshadow your tubes & your frames

Find one of the flower vines
Resize some
Rotate it & Place it where you wish
As mine is just a guide
Dropshadow

Now grab one of the flowers & Place
it to the bottom left of your left frame
Dropshadow

Get one of the Good/Bad Locks
which ever you want to use & Place it
in the right top corner of your left frame
Erase part of it to make it look like its hanging
on the frame
Dropshadow

Now find one of the fasterners
Place it on your right frame at the top left corner
Dropshadow

Again use one of the Alpha's you wish
to use & Place it on top of your fasterner
to make it look like its holding it in place
Dropshadow

Now Add your Copywrite & Your name
Bam your done!!
Resize to 85-90%
Save

Hope that was easy for you, I kinda learned something
new with the filter

This Tut was written by me on Feb. 19th 2009



Monday, February 16, 2009

Wow!!! Another Award

Wow!!
I got another Award
This Award came from a Good Friend Sylvie over
at her Awesome Blog you can find it HERE

The rules of the award is that:
1. That I must post the award here on my blog
2. Nominate at least 10 blogs that show attitude/gratitude
3. Link to the blogs that you are nominateing
4. Let them know that they have received this award
5. Share the love & link to this post

So the award goes to:
Beaches over at Blame Beaches Tutorials HERE
Noeleen over at Designz by Irishlas HERE
Stayyseee over at Stayysee Productionz HERE
Doris over at Scraps Dimensions HERE
Heather over at Just Dreamin you can find her HERE
Karla over at Lacarolita's HERE
Zory over at Boomies Scraps & Dreams HERE
Seachell over at Seachell Scraps HERE
Lyn over at Lyn Designz HERE
Lisa over at Arty-Pharty Scraps HERE
Sorry if you have already received it, had a hard time finding anyone
that already hadn't received it..


Tuesday, February 10, 2009

President's Day

YAY!!
Got another Tut for you

Click on tag to get full view

You must have a knowlege of PSP to do this tut

Yes I am useing another Ismael Rac Tube
When I seen this scrap I had to go buy the tube
You can get it over at MPT, you must have a license to use his work

Mask of Choice, I am useing a round one
Font of choice, I am useing A&S California Plug

Scrap is another Awesome FTU called President's Day
from the Talented Seachell you can find it HERE
Make sure you leave her some Lovein's
Thank You Darling!!
Ready to get this thing Done?
Let's do it!!

Open a new Canvas 700x700
Crop/Resize later

Find the Frame you are wanting to use.
There are 3 as mine is just a guide
Copy/Paste it onto canvas

Find the paper of choice as well
Click in the middle of your Frame with
your Magic Wand, Selections, Expand by 5
Copy/Paste, Selections, Invert & Hit delete on your keyboard
Dropshadow Frame

Now find your tube that you are going to use
Postion it where you wish or looks best
Dropshadow it

Now Grab your Flowers of choice
Copy/Paste, Resize some
Move them below your Frame
Duplicate, Image, Mirror or Flip
Depending where you put it
Continue to do that with your others that you are using
Dropshadow
Find the Element 17 or if you want to use another ribbon
Copy/Paste it where you wish
Dropshadow
Grab the Balloons, Resize a little as well
Place them where you wish
I added some noise to the red one, just add some flair
Dropshadow

Find some fireworks, resize & place them on your paper
behind your tube
Dropshadow

Click on the background layer
Find the paper you are wanting to use
Layers, New mask Layer, find your mask
Merge, Merge Group

Add Your Copywrite & Your Name
WOOHOO!!
Your Done
Hope you enjoyed antoher easy peasy tut

This Tut was written by me on Feb. 10th 2009

Thursday, February 5, 2009

Rock On


WOOT!!
Got another Tut done

Click on tag to get full view
You must have a working knowlege of PSP to do this tut
I am useing the artwork of Ismael Rac
You must have a license to use his work
you can get it over at MPT

Weescotslass Mask #84
found HERE
TY Hun!!
Font of choice
I am useing WaterBrush Rob

Another Awesome Scrap from Kristen
over at Wicked Scrapz its called Rockstar
and you can get it HERE
Thank You Again Hun!!
Make sure you leave some love while downloading

Ready? Let's get this thing done
Open your supplies in PSP
Open a new canvas 700x700
You can crop/resize later

Open Paper of choice
Layers New Mask Layer
Find your mask in the drop down box
Merge, Merge Group
Grab Frame 2
Copy/paste as a new Layer
Get your magic wand, click in the center of frame
Selections, Modify, Expand by 5
Find your paper of choice
Selections, Invert & Delete on your keyboard
Find the tube you are going to use
Copy/Paste, move orignal down below your frame & Duplicate it
Move above your frame & erase anyparts hanging over on both tubes
Dropshadow your frame & tube

Find the Ribbon that you are going to use
Resize a little, Dropshadow
Erase any parts that you don't want hanging over your frame


Find a ticket of choice
Place where you wish
Dropshadow

Grab the microphone, place it where you wish as well
Dropshadow

Get some wordart place it where you wish
Dropshadow as well

Find your Flowers that you are going to use
Place them as you wish or look at mine
Dropshadow

Do the same with your Butterfly of choice
the Skull & anything else you would like to use
Dropshadow


Add your copywrite & your name

Woot!!
Your Done


This Tut was written by me on Feb. 5th, 2009


Tuesday, February 3, 2009

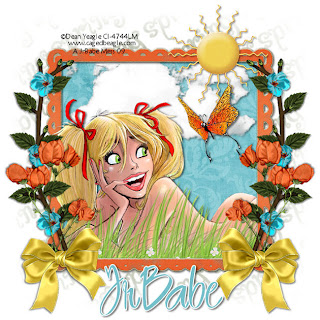
Spring Whispers


Don't know about you guys but I'm ready for Spring
So here's a new tut

Click on tag to get full view
You must have a working knowelege of PSP to do this tut

I am useing the Cute work of Dean Yeagle
You must have a license to use his work
and you can get it over at CILM

The Awesome Scrap called Spring Whisper's from Seachell over
at Seachell's Scrapz you can find it HERE
Make sure you leave a little love while downloading
it only takes a few mins..
Thank You Hun!!
HUGS

A font of choice or the one I am useing
its called 1 Snappy DNA
Mask of choice

Ready to get this thing started? Let's do it!!

Open a New Image 700x700
We will crop/resize later

Find Element 34 or one of choice
Copy/Paste on to canvas

Grab your Magic Wand click inside
Selections, Modify, Expand by 5
Copy & Paste paper of choice
Selections, Invert & Hit delete on your keyboard
Dropshadow your Frame


Now take your Tube of choice
Copy/Paste on to your canvas
If any is hanging over erase any parts
Dropshadow your tube

Now find the clouds
Copy/Paste & if you want it to look like its behind your
tube move it below, Erase any parts if there outside your frame
Dropshadow

Find your Sun
Copy/Paste place where you wish
Dropshadow

Grab your Ribbon of choice
Place where you wish
Dropshadow it as well

Find some Flowers of choice
Copy & Paste them where you wish
Dropshadow


Click on your Background over
in your Layer Platte & Copy/Paste
Paper of choice
Layers, New Mask Layer find your mask in
the drop down box
Merge, Merge Group

Add Your Copywrite & Your Name
Crop/Resize
85%-90%

YAY!! Your Done
Wasn't that Easy Peasy?


This Tut was written by me on Feb. 3rd 2009